— NVR General Settings — Define Camera/Connection —
NVR — General Settings
Define Camera/Connection
The DETEXI NVR supports most network cameras as well as analog to IP video servers (encoders). Before recording can occur or live video can be viewed in the DETEXI Client network camera
must be defined in the NVR Control Center.
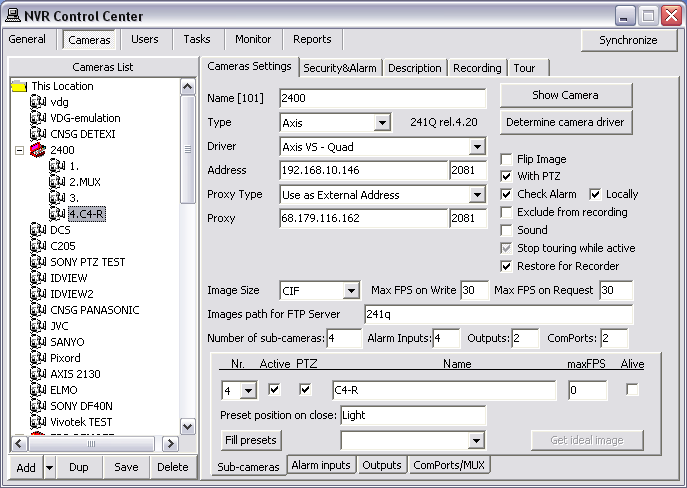
- In the NVR Control Center switch to the Cameras.
- Below the Cameras List make sure that Video Server is chosen as add type from the drop-down list next to Add button, then click Add button to open blank Cameras Settings dialog;
— or —
Click Dup button to open a copy of selected camera settings for editing.
- Enter a descriptive name for the camera/video server into Name input field.
- From the Type drop-down list, choose camera/video server type.
- Type camera IP address and port number into Address input fields.
- If camera is already installed, click Determine camera driver button to allow the NVR auto-configure the driver to be used for communication.
- If camera has Pan/Tilt/Zoom capabilities, With PTZ checkbox must be checked to enable them in the NVR and Client.
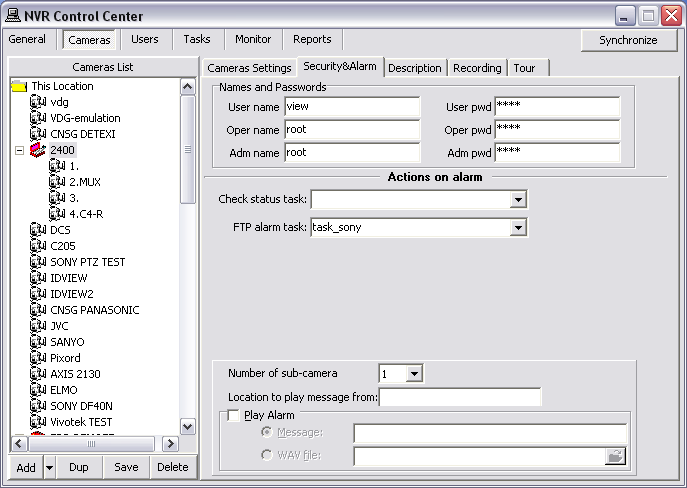
- If required, switch to the Security & Alarm to setup security settings.
- Click Save button to save camera settings.

- Auto-configured camera driver gives the NVR more specific information about the camera enabling better resolution and bandwidth control. If you choose the driver from Type drop-down list, the resolution information will be more generic and bandwidth control will not be as efficient.
- There must be direct access to the network camera IP Address and Port from the NVR. Make sure any personal and hardware firewalls between them allow for bi-directional communications for this IP Address and Port.
— NVR General Settings —Camera Security Settings —
NVR — General Settings
Camera Security Settings
- With the camera selected switch to the Security & Alarm .
- Under the Names and Passwords enter usernames and passwords. They should match the users that are defined within the camera.
- In most cases, camera will only have one username and password by default, with administrative privileges; in this case enter Adm name and Adm pwd accordingly.
- Click Save button to save settings under the Cameras List.


 DETEXI® Network Video Management System


