Home
DETEXI® Network Video Management System
  EXPAND YOUR CONCEPTS OF SECURITY
Home   Site Map
Javascript Tree Menu
    
  • Adjust Motion Settings
  • Region of Interest (ROI)
  • Set as Default, Save Settings
— Adjust Motion Settings —
Adjust Motion Settings
When a schedule has motion detection enabled, the Motion Settings become available to the user. These settings are not required, but can be used to optimize motion detection for each individual camera and its environment. Motion settings apply only to the currently selected recording schedule, allowing different motion settings to be applied to different times of day and levels of light. A set of motion settings can be defined as the default, which will automatically apply to all new schedules created for that camera.
Motion Indicator Graph / Roughness and Sensitivity
Video motion detection defines activity by analyzing data and differences in a series of images. Software algorithms continually compare images from a video stream to detect changes in an image. The motion indicator graph (at bottom left) indicates the motion detected.
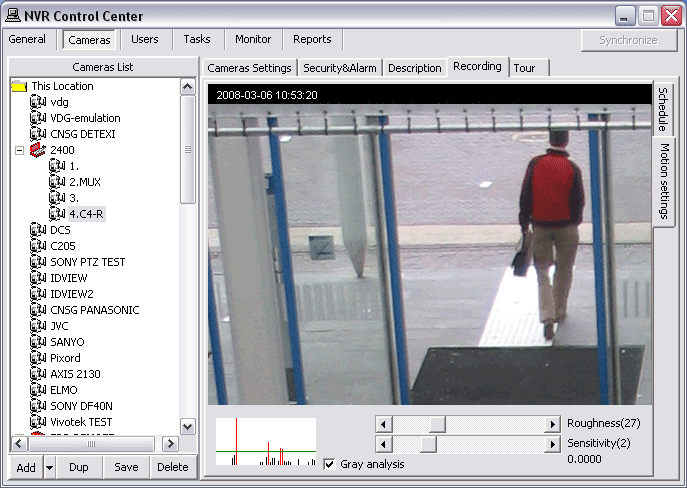
  • Each vertical line in the graph indicates motion detected; the height of the line shows how much motion was detected at the moment.
  • When a vertical line passes above the green horizontal line it turns red, indicating that motion detected will trigger the system reaction.
Two parameters are available for fine-tuning the system. These parameters include the Roughness for how large an object should be for the system to trigger, and Sensitivity for how much an image can change before the system reacts. Finding the right balance between these settings will directly impact the number of false alarms the system will give and whether all relevant motion in the scene is detected.
— Adjust Motion Settings — Region of Interest (ROI) —
Adjust Motion Settings
Region of Interest (ROI)
Region of interest (ROI) defines the region of the camera’s view that should be analyzed for motion. Regions that will be analyzed show red, while motion in unpainted regions will be ignored. The ROI grid can be resized and moved, and each box within the grid can be turned on or off individually. If no ROI is defined, the entire view will be analyzed for motion.
To create a Region of Interest (ROI) for an existing recording schedule —
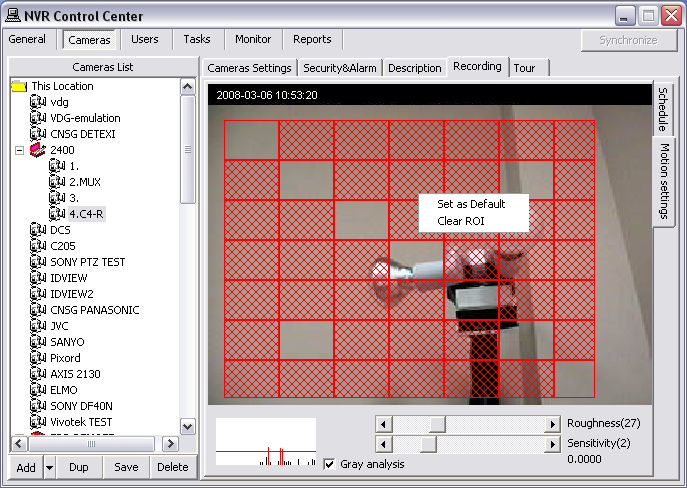
  1. In the NVR Control Center — Cameras select a camera from the Cameras List and switch to the Recording.
  2. Select a recording schedule with motion detection and switch to the Motion Settings right side tab.
  3. Draw a ROI by left-clicking and dragging from the upper left corner to the bottom right corner of the image — a red grid will be drawn, indicating where the ROI is.
    To resize ROI select the bottom right corner and drag it.
    To move ROI left-click and drag it to a new place.
    To deselect/reselect a section of the ROI click on the section holding Ctrl key.
    To clear ROI right-click and select Clear ROI.
— Adjust Motion Settings — Set as Default, Save Settings —
Adjust Motion Settings
Set as Default, Save Settings
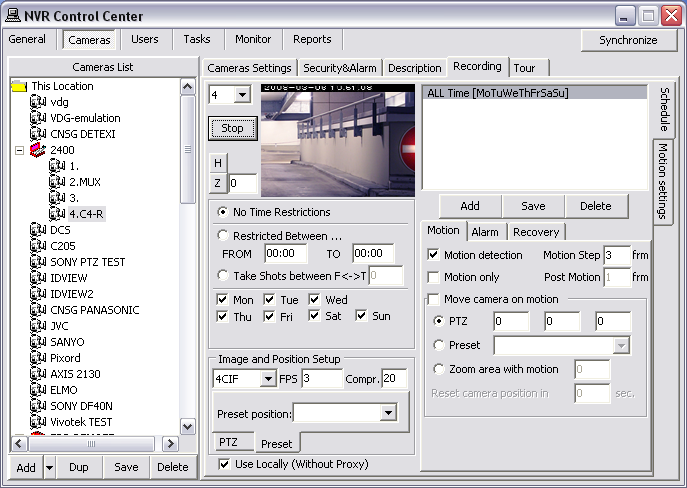
  1. A set of motion settings can be defined as the default, which will automatically apply to all new schedules created for that camera. To set as default right-click and select Set as Default.
  2. After defining the motion settings, users must return to the Schedule tab and click Save button below the Schedule list to save the selected schedule or the settings will be lost.
  3. Make sure that the Recorder and Check Drive services are running and monitored. If the recording services were left running during configuration, click Synchronize button in the NVR Control Center — Monitor to activate the new settings.