— Setup NVR Domain — Accept/Reject Registration —
Setup NVR Domain
Accept/Reject Registration on Domain Controller
When a registration request from the NVR is received, the NVR Domain Controller administrator (exclusive master user) can
accept or
reject the request or delay a decision and keep the NVR and Domain Controller logical connection in a
NEW mode when the Domain Controller can "see" the NVR components and settings but can not remotely update any of them.
An appropriate message will appear on the NVR-requester and the Domain Controller.
- Registered — the NVR registration request is accepted — the NVR Domain Controller will import and keep up-to-date information about the remote (child) NVR cameras settings. Updating the NVR settings from the Domain Controller will be allowed.
- The NVR and Domain Controller will stay logically connected until the NVR or Domain Controller administrator requests to unregister.
- Registration Rejected — the NVR registration request is rejected — a logical connection between the NVR and Domain Controller won’t be established.
- Registration not Complete — the NVR registration request is not accepted or rejected — the NVR and Domain Controller logical connection stays in a NEW mode when the Domain Controller can "see" the NVR components and settings but can not remotely update any of them.
- The registration request in a NEW mode may be accepted or rejected at any time.
- Accept Registration Request
- Reject Registration Request
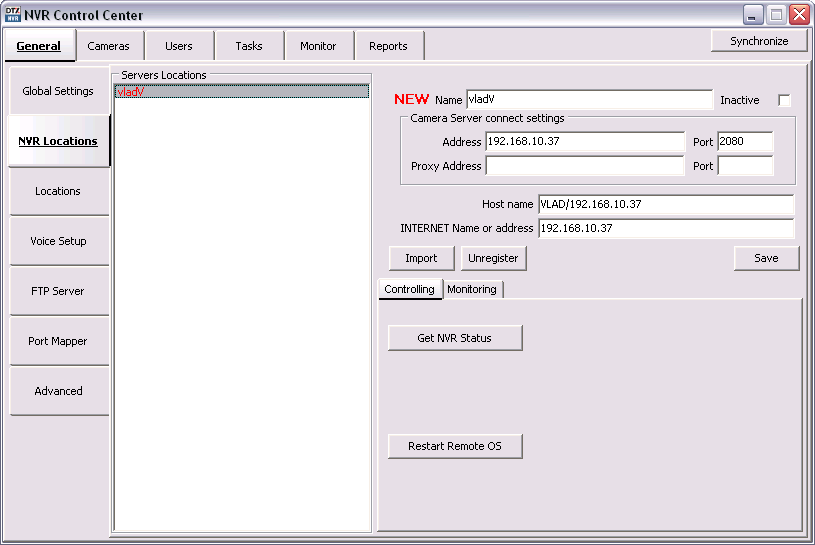
- In the Domain Controller NVR Control Center go to General — NVR Locations.
- A NEW location appears in the Servers Locations list defining the NVR-requester settings —
- Name — the NVR location name;
- Camera Server Connect Settings — the NVR IP Address and Port number, Proxy Address and Port number if proxy server is used to connect to the Internet — will be used by the DETEXI Client connected to the Domain Controller to get the child NVR address when searching the NVR archive.
- Host Name — the NVR name/address;
- INTERNET Name or Address — the NVR name/address (must be the same as in the Camera Server Connect Settings).
- Click Import button to import the NVR-requester cameras settings. Provide credentials and wait until the data import is complete.
- The NVR becomes registered on the successful completion of the import process — proper messages appear on both sides.
- Connection settings can be changed. Click Save button to save changes.
- The authorization will be required — credentials supplied by the NVR administrator should be provided.
- The NVR Domain Controller has the same graphical user interface named NVR Control Center as the NVRs just with expanded functionality.
- In the Domain Controller NVR Control Center go to General — NVR Locations.
- A NEW location appears in the Servers Locations list defining the NVR-requester settings —
- Click Unregister button. Provide credentials. The NEW NVR location will be deleted from the Servers Locations list.
- The NVR becomes unregistered — proper messages appear on both sides.
- The authorization will be required — credentials supplied by the NVR administrator should be provided.
- The NVR Domain Controller has the same graphical user interface named NVR Control Center as the NVRs just with expanded functionality.


 DETEXI® Network Video Management System


