— Managing Cameras — Camera Location Map —
Managing Cameras
Camera Location Map
Additional NVR feature is camera location mapping, which overlays camera icons that represent the locations of cameras on a map of a building or area. To easily select a camera, camera icons will be placed on a map that is imported into the NVR. Using a mapping functionality, finding the right camera becomes very intuitive.
- Add Camera Location
- Set Map Elements
To create a new cameras location —
- In the NVR Control Center — General — Camera Locations click Add button under the Cameras Locations list.
- Enter a new Location Name and click Load Map Image button to choose a map file.
- When the location map file is selected — Set Map Elements button appears. Click the button to place cameras icons on the map.

- The map file can be a photo or a drawing in a standard image format such as JPG, GIF, or PNG.
Clicking the
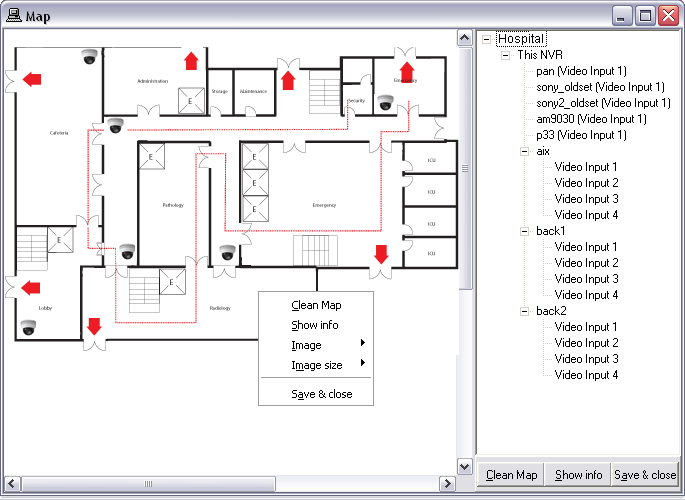
Set Map Elements button launches a
Map page allowing for users to select a camera from the NVR cameras list and place a camera icon anywhere on the selected map.
- Drag and drop on the map a camera name from the list — a camera icon will appear on the map.
- The selected camera excludes from the available cameras list.
- To change camera icon to one of 4 avalable images select Image from the right-click menu.
- To change icon size select Image Size from the right-click menu.
- Click Show Info to show camera name next to the icon.
- Click Save&Close button to save cameras location map and close the Map page.
- Click Save button under the Cameras Locations list.

- The map file can be a photo or a drawing in a standard image format such as JPG, GIF, or PNG.
— Managing Cameras — Select Camera Using Location Map —
Managing Cameras
Select Camera Using Location Map
Additional NVR feature is camera location mapping, which overlays camera icons that represent the locations of cameras on a map of a building or area. To easily select a camera, camera icons will be placed on a map that is imported into the NVR. Using a mapping functionality, finding the right camera becomes very intuitive.
- Launch MAP page
- Select camera
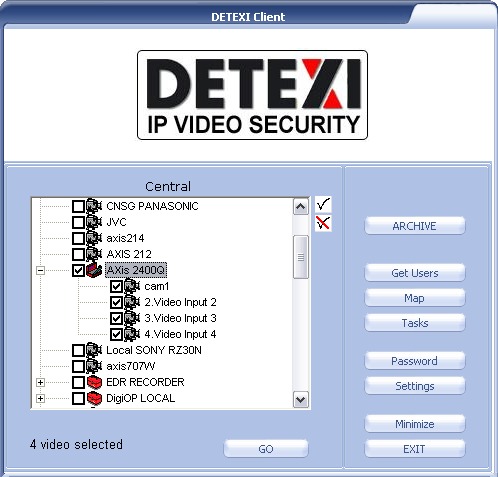
On the Client
Start Page click
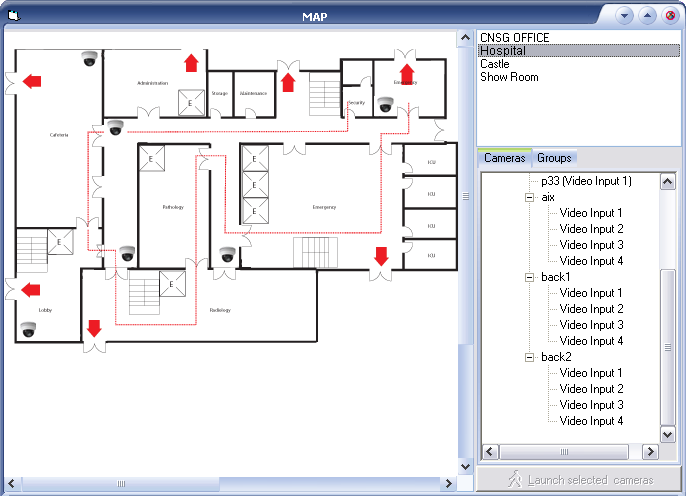
Map button to launch a MAP page allowing for users to browse and select cameras by location on one or more maps.
- The button is only visible if at least one map location is configured in the NVR with at least one camera assigned to it.

- In the Remote Client cameras available in the cameras list and/or maps will depend upon the user logged in permissions.
- Select a location map from the top right list.
- The Cameras list will also be provided (cameras, positioned on the selected map)
- To launch a single camera live view — click on a camera on the map.
- To launch multi-cameras live view — holding Ctrl key click on any number of cameras on the map to select/deselect multiple cameras.
- Then click Launch selected cameras button below the Cameras list.
- Holding Ctrl key multiple cameras from the list can be selected
- Multiple cameras from the map and the list simultaneously can also be selected

- The map file can be a photo or a drawing in a standard image format such as JPG, GIF, or PNG.

 DETEXI® Network Video Management System


