— Managing Cameras — Define Camera/Connection —
Managing Cameras
Define Camera/Connection
Before recording can occur or live video can be viewed in the DETEXI Client network camera
must be defined in the NVR Control Center.
To define a new camera —
- In the NVR Control Center switch to the Cameras.
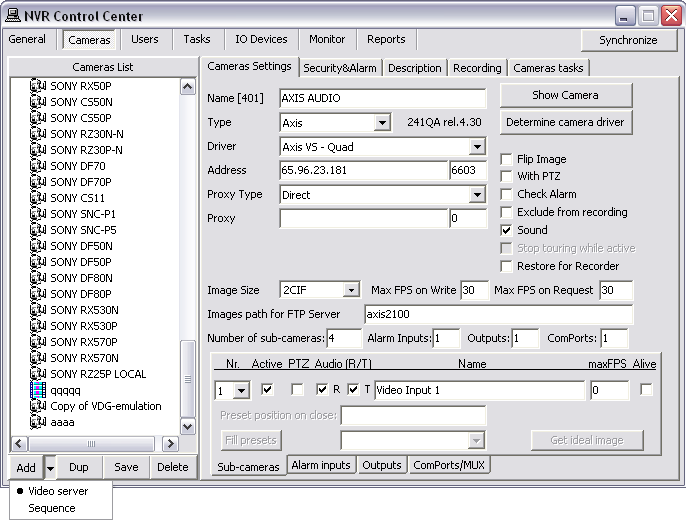
- Below the Cameras List make sure that Video Server is chosen as add type from the drop-down list next to Add button, then click Add button to open blank Cameras Settings dialog;
— or —
Click Dup button to open a copy of selected camera settings for editing.
- Under the Cameras Settings enter a descriptive name for the camera/video server into Name input field.
- From the Type drop-down list, choose camera/video server type.
- Type camera IP address and port number into Address input fields.
- If camera is already installed, click Determine camera driver button to allow the NVR auto-configure the driver to be used for communication.
- If camera has Pan/Tilt/Zoom capabilities, With PTZ checkbox must be checked to enable them in the NVR and Client.
- Switch to Security & Alarm to setup security settings.
- Click Save button to save camera settings.
- Auto-configured camera driver gives the NVR more specific information about the camera enabling better resolution and bandwidth control. If you choose the driver from Type drop-down list, the resolution information will be more generic and bandwidth control will not be as efficient.
- When a camera is installed and setup you can test the camera connection by pressing Show Camera button — a test window showing live video should pop up. Test window doesn’t show a high resolution image; it simply proves a connection to the camera.
- There must be direct access to the network camera IP Address and Port from the NVR. Make sure any personal and hardware firewalls between them allow for bi-directional communications for this IP Address and Port.
— Managing Cameras — Setup Camera Security Settings —
Managing Cameras
Setup Camera Security Settings
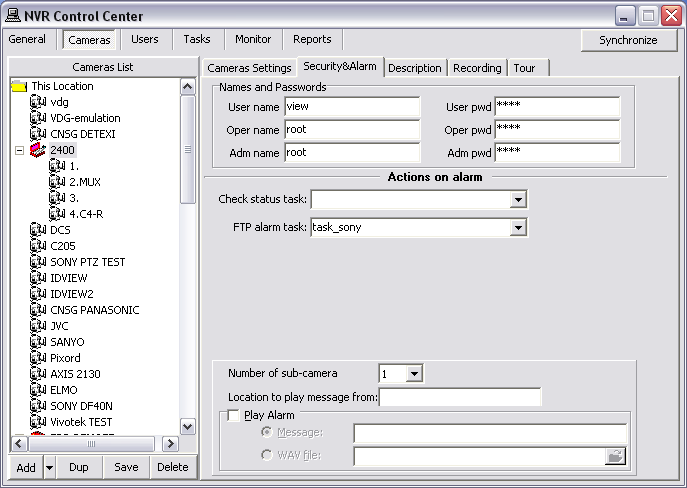
- With the camera selected switch to the Security & Alarm .
- Under the Names and Passwords enter usernames and passwords. They should match the users that are defined within the camera.
- In most cases, camera will only have one username and password by default, with administrative privileges; in this case enter Adm name and Adm pwd accordingly.
- Click Save button to save settings under the Cameras List.
— Managing Cameras — Camera Description —
Managing Cameras
Camera Description
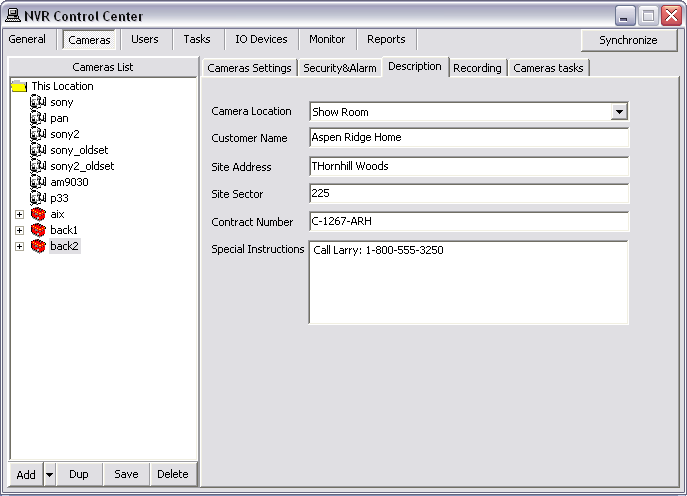
It is really important to give a camera full and meaningful description. When an alarm event occurs, the information will be used to provide specifics to a real-time operator.
- With the camera selected switch to the Description .
- Enter the required information.
- Click Save button to save settings under the Cameras List.
— Managing Cameras — Sorting Cameras in the List —
Managing Cameras
Sorting Cameras in the Cameras List
To sort the cameras in the
Cameras List in your result set —
- In the NVR Control Center — Cameras double-click on the top bar of the Cameras List — the bar will accommodate Move Down, Save cameras order, Cancel and Move Up buttons.
- Select a camera to move.
- Use Move Down/Move Up buttons to change the order.
- Click Save cameras order button to save the order or Cancel to return to previous.


 DETEXI® Network Video Management System


