— Managing Cameras — Enable/Disable Recording —
Managing Cameras
Enable/Disable Recording
Before setting up any type of recording ensure first that recording is enabled for the selected camera.
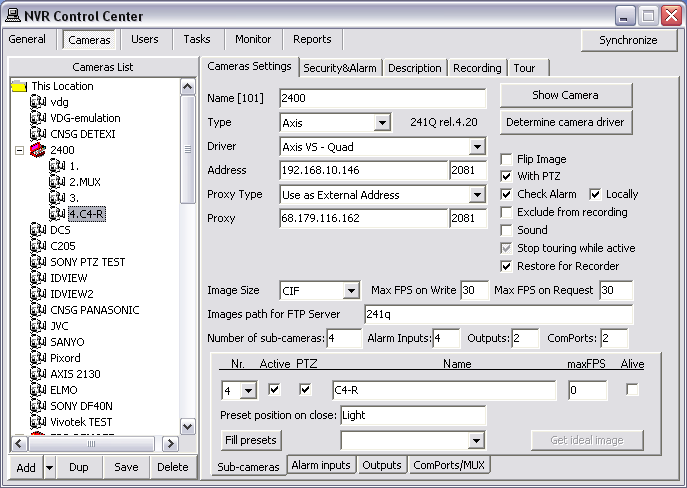
- After the camera was generally defined in the NVR it has recording enabled by default — the Exclude from recording checkbox is unchecked.
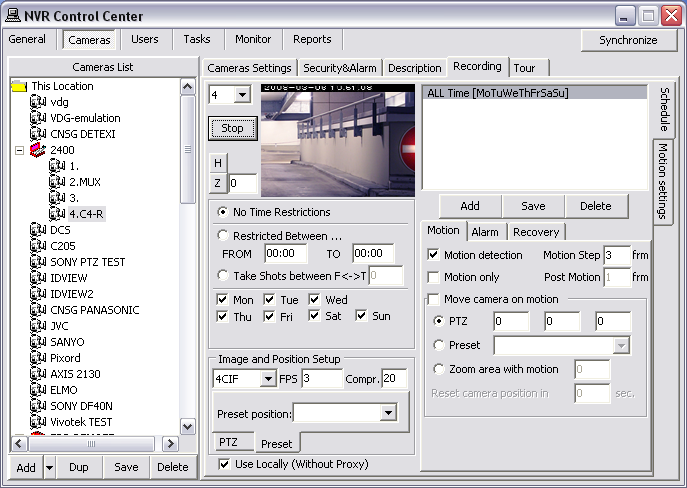
- Turning on recording requires at least one schedule to be added and configured for the camera; type of recording, and motion settings (if appropriate) defined.
- To optimize performance disable recording for the cameras that are not intended for recording. Thus the Recorder will ignore those cameras completely, freeing resources for other tasks.
To disable recording for a camera —
- In the NVR Control Center — Cameras select a camera from the Cameras List.
- In the Cameras Settings check Exclude from recording checkbox to disable recording for the camera.
- Click Save button below the Cameras List to save changes.

- Recording can be temporarily disabled for a camera without removing recording schedules and configurations by using Exclude from recording checkbox. If recording is enabled again later (the checkbox is unchecked again), all previous recording schedules and configurations will be restored.
— Managing Cameras — Setting up Camera Recording Instructions —
Managing Cameras
Setting up Camera Recording Instructions
In the DETEXI NVR video can be recorded
on schedule (24/7 or other) with or without
motion detection and
on trigger.
- Scheduled recording can combine both continuous and triggered recording instructions (within schedule).
- An alarm-triggered recording can be activated by, for example, video motion detection or an external input through a camera’s input port.
- With scheduled recordings, timetables for both continuous and alarm or motion recordings can be set.
After setting up the type of recording method, the
quality of the recordings can be determined by selecting the video
resolution, and level of image
compression. The number of
frames per second can be set in all recording modes.
- These parameters will affect the amount of bandwidth used as well as the size of storage space required.
- Any type of recording can be configured for the selected camera in the NVR Control Center — Cameras — Recording

- Learning the NVR motion detection and event management system should allow a better understanding of how to configure system settings including recording rules.
— Managing Cameras — Synchronize Recording Services —
Managing Cameras
Start or Synchronize Recording Services
There are two NVR services that should be running and monitored by the Monitor service in order to record —
Recorder and
Check Drive.
- Recorder service records information and images from each video input into the NVR archive, according to the configured schedules, preferences, alarms and events.
- Check Drive service monitors the condition of the storage path and device to confirm existence and available space for new video being recorded to the archive.
The DETEXI NVR recording services support runtime configurations. This means that changes in the cameras recording settings can be made without stopping the NVR services.
When you are ready for your recording settings to take effect, start the Recorder and Check Drive services from the
NVR Control Center — Monitor or if the services were running and monitored during the
configuration just click the
Synchronize button to activate the new configurations.
The
Synchronize button is found in the upper right corner of any
NVR Control Center page.
- All NVR services are visible and configurable in the NVR Control Center — Monitor.
Check Alarm Service
If
Recording on Input Alarm method is setup in a camera/video server schedule, the
Check Alarm service responsible for watching the status of IP device inputs should also be running and monitored.
- Check Alarm service monitors the hard inputs of connected video devices, and raises alarms when defined changes are seen on such inputs.

 DETEXI® Network Video Management System


